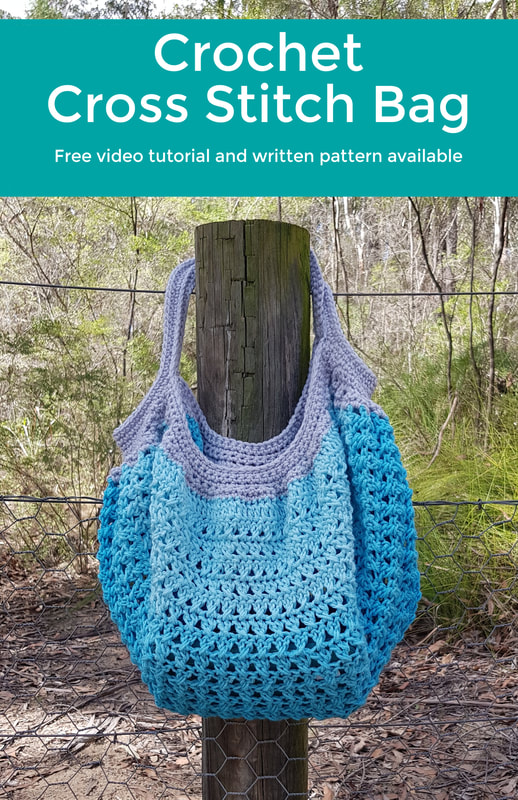
Cross stitch market bag
Would you like to buy me a cup of Tea to say thank you for the free pattern and video? Thank you xxx
Click below ⬇⬇
Buy me a coffee
Click below ⬇⬇
Buy me a coffee
|

|
Add this project to your Ravelry project page


Designed by Clare Sullivan
Video tutorial
https://youtu.be/Ao8dd48-GE8
US terminology
Easy+
(This pattern will also work in a DK/8ply/Number 3 weight yarn, you will need a 4mm/G hook)
86 grams/ 3oz worsted
Light Grey Red Heart Super Saver
176 grams/6.1 oz worsted
Red Heart Super Saver Ombre in scuba
5mm / H hook
Scissors, yarn needle, tape measure
Right side - the nice side of you crochet - The First Row Is the Right Side
Multiple for this pattern is 2. I have used the foundation double crochet for this pattern but you can use the chain method if you prefer. The multiple for both ways is 2.
Multiple for this pattern is 2. I have used the foundation double crochet for this pattern but you can use the chain method if you prefer. The multiple for both ways is 2.
1 - RIGHT SIDE - place a stitch maker on the right sideMake 70 stitches for a total length (when stretched a little) of 24 inches / 60 cm, turn
- If you want your bag bigger add more, if you want it smaller do less.
- If you have used the chain method, you need to double crochet into the 4th ch, dc in each stitch across
- Using either method, (chain method OR the foundation double crochet) you should have 1 row of double crochets
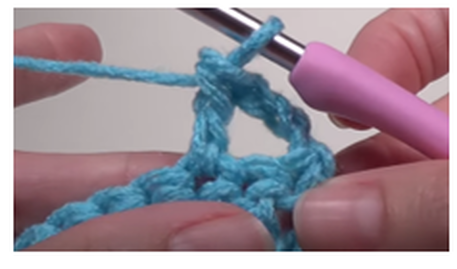
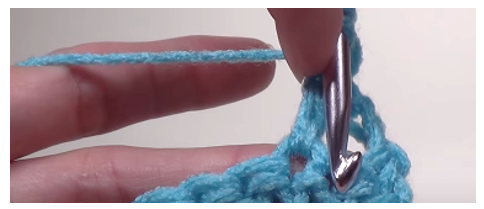
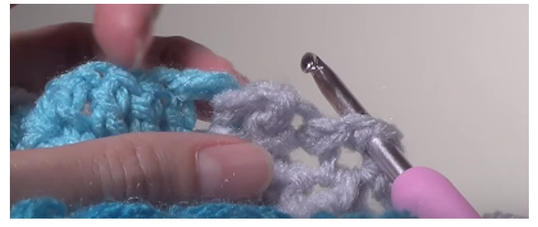
2 - Ch 3, skip 1 stitch (image 1) 1 dc into the next stitch (image 2) dc into the skipped stitch (image 3)*Skip the next available stitch, 1 dc into the next stitch, dc into the skipped stitch* repeat across the row, 1 dc into the last stitch, turn
Repeat the previous row, make sure you cross stiches stack on top of each other
Continue until you have 27 rows of cross stitch and 28 rows in total
Repeat the previous row, make sure you cross stiches stack on top of each other
Continue until you have 27 rows of cross stitch and 28 rows in total
Complete 1 row of plain double crochet for a total of 29 rows
If you choose a different amount of row, make sure you have 1 row of dc, odd amount of cross stitch rows and 1 row of dc for a total of odd amount of rows
The first row and last row are the tops of the bag, the ends of our rows is going to be the sides of our bag. If you place a stitch marker on the first and last row it make it easier to see when you are making the edging
Edges
If you are using a contrast yarn, cut your main colour and finish off and join in your contrast yarn to the same place
If you are using a contrast yarn, cut your main colour and finish off and join in your contrast yarn to the same place
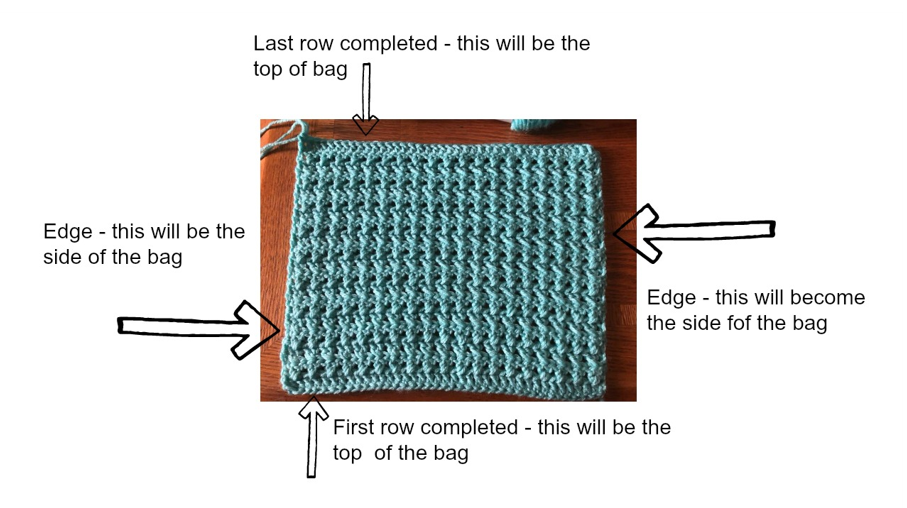
Starting on the right side of your work - the stitch maker you added at the beginning of our project will remind you what the right side of your crochet is
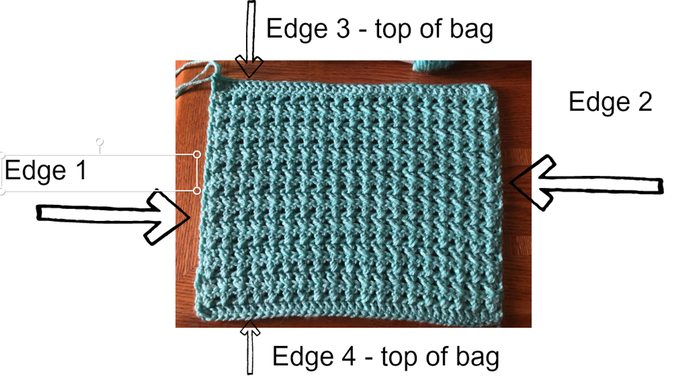
We complete 4 edges in total, 1 for each side of your square/rectangle you just crocheted - 2 sides and 2 tops of the bag
Edge 1
We complete 4 edges in total, 1 for each side of your square/rectangle you just crocheted - 2 sides and 2 tops of the bag
Edge 1
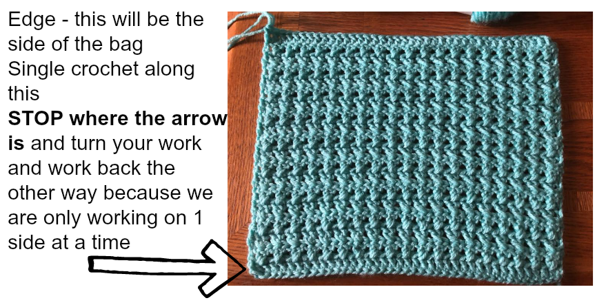
- Single crochet along the first edge, putting 2 sc in to each space - this is the space between the last or first dc and first or last set of cross stitches of the row, turn
2 - Ch 1, sc decrease in each stitch all the way across, turn
3 - Repeat row 2
4 - Sc into each stitch, turn
5 - Repeat last row
3 - Repeat row 2
4 - Sc into each stitch, turn
5 - Repeat last row
Edge 2
Repeat what we did for the first edge making sure you are starting your crochet on the same side, the right side of your work J
DO NOT CUT YARN
Repeat what we did for the first edge making sure you are starting your crochet on the same side, the right side of your work J
DO NOT CUT YARN
Top of bag - Edge 3
- Single crochet - working along the side of the edging you have just complete and across the row of double crochets, then across 5 stitches of the other edging, turn
- Sc decrease in each stitch across, turn
- Sc in each stitch across, turn
- Repeat row 3
- Repeat row 3, finish off
Edge 4
Repeat instructions for 2nd top of bag
With right side facing, join yarn into the end of the last row of the side edging - sorry I know this is confusing, hopefully this photo helps, or you can go to the video at the 39:30 mark
DO NOT CUT YARN
Repeat instructions for 2nd top of bag
With right side facing, join yarn into the end of the last row of the side edging - sorry I know this is confusing, hopefully this photo helps, or you can go to the video at the 39:30 mark
DO NOT CUT YARN
Handles
Working on the right side
You will now be working along the side of the bag
1 - Single crochet into each stitch on the side of the bag
3 - Single crochet into each stitch around. Join to the first sc with a slip stitch
Working on the right side
You will now be working along the side of the bag
1 - Single crochet into each stitch on the side of the bag
- Working on the top of the bag, ch 50, skip all of the stitches of the top section of bag, making sure the ch isn’t twisted, single crochet into the 1st stitch of the side of the bag (that we have not crocheted into yet for the handles)
- Single crochet along the side of the bag
- Working on the top of the bag, ch 50, skip all of the stitches of the top section of bag, making sure the ch isn’t twisted. slip stitch to the first sc of the round
3 - Single crochet into each stitch around. Join to the first sc with a slip stitch
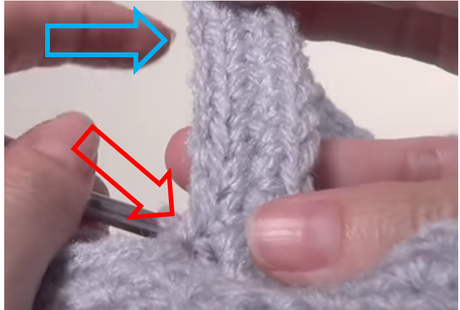
Working on the inside of the handles
Thank you so choosing my pattern
Happy crochet, Clare xx
- Attach yarn into a stitch on the top edge of the bag (red arrow) closest to the handles (blue arrow is showing handle) slip stitch across top edge of bag and around the inner edge of handles
Thank you so choosing my pattern
Happy crochet, Clare xx