
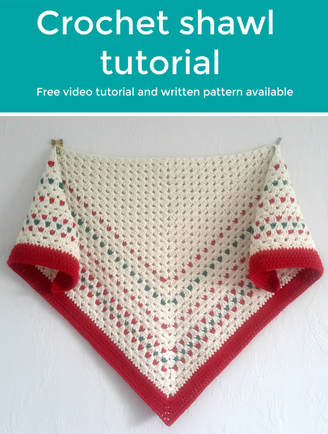
Crochet down the line shawl
Would you like to buy me a cup of Tea to say thank you for the free pattern and video? Thank you xxx
Click below ⬇⬇
Buy me a coffee
Click below ⬇⬇
Buy me a coffee
|
|
Add to your Ravelry queue and project page


Shawl size using yarn specified in pattern 46 x 23 inches / 116 x 58 cm
(Worsted weight comes out 52 x 26 inches / 132 x 66 cm)
Easy to adjust the size/length - add more rows for a longer shawl
Designed by Clare Sullivan
Video tutorial – https://youtu.be/jlbIcq4hI9s
US terminology
Red heart shimmer number 3/DK/8ply 100 gram in 3 colours
Main colour - 2 x cream (I had about 30 grams left from 1 ball)
Contrast - 1 x red
Contrast - 1 x green
5mm / H hook - loose tension will give you a nice drape, rather than a stiff shawl
NOTE: If you have trouble with it not lying flat, use a bigger hook OR put a chain 1 in between your groups of 3 double crochet’s
Yarn needle and scissors and optional stitch marker
Make magic ring
1. Ch 3, 3 dc, ch 3, 4 dc, turn You can pull the tail of your yarn to close up the magic ring
2. Ch 3, 3 dc into space between first and second stitch (see image 1) (3 dc, ch 3, 3 dc) into ch 3 space (see image 2) 4 dc’s into space between last and 2nd last stitch (see image 3 and 4) turn
1. Ch 3, 3 dc, ch 3, 4 dc, turn You can pull the tail of your yarn to close up the magic ring
2. Ch 3, 3 dc into space between first and second stitch (see image 1) (3 dc, ch 3, 3 dc) into ch 3 space (see image 2) 4 dc’s into space between last and 2nd last stitch (see image 3 and 4) turn

3. Ch 3, 3 dc between the first and second stitch (see image 5 above) 3 dc into next space (the space between the groups of 3dc’s, like when you make a traditional granny square) (3 dc, ch 3, 3 dc) into ch 3 space, 3 dc into next space, 4 dc’s into space between last and 2nd last stitch, turn
4. Repeat the last row until you have 17 rows (or desired amount) you will gain extra spaces each row. DO NOT FINISH OFF YARN - place a stitch marker in the stitch loop so it doesn’t unravel
Single crochet row - the sc row will always be worked on the same side place stitch marker on the side you are doing the single crochet
Join contrast (red)
18. Sc into first stitch and each stitch across, 3 sc into ch 3 space, sc across, finish off contrast yarn
18. Sc into first stitch and each stitch across, 3 sc into ch 3 space, sc across, finish off contrast yarn
19. Place main yarn back on hook and repeat row 3, but work into the spaces 2 rows below (your last main colour row)
20. Repeat row 3 26. Repeat row 18 32. Repeat row 18
21. Repeat row 3 27. Repeat row 3 33. Repeat row 3
22. Repeat row 18 28. Repeat row 3 34. Repeat row 18
23. Repeat row 3 29. Repeat row 3 35. Repeat row 3
24. Repeat row 3 30. Repeat row 18 36. Repeat row 3
25. Repeat row 3 31. Repeat row 3 37. Repeat row 3
Edging - The edging is always worked on the same side as the sc.
38. Join red, 2 hdc into first stitch, hdc across, 3 hdc into ch 3 space, hdc across, 2 hdc into last stitch. Finish off yarn
39. Re-join yarn at the beginning of the row, hdc through back back loop all the way across, 3 hdc through back back loop into the 2nd stitch of the 3 hdc from previous row)
40. Repeat last row as many times as you like
Thank you for choosing my pattern
Happy Crochet, Clare xx
|
|
|
