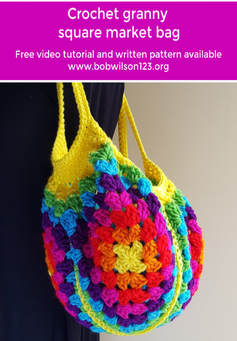
Granny square market bag
Would you like to buy me a cup of Tea to say thank you for the free pattern and video? Thank you xxx
Click below ⬇⬇
Buy me a coffee
Click below ⬇⬇
Buy me a coffee
Add pattern to your Ravelry queue and project page
Designed by Clare Sullivan
Video tutorial https://youtu.be/Ao8dd48-GE8
US terminology
Easy+
Red Heart Super Saver number 4
worsted/10ply/aran and a 4.5 mm hook
(This pattern will also work in a DK/8ply/Number 3 weight yarn, you will need a 3.5mm/F hook)
Scissors, yarn needle, tape measure
Right side - the nice side of you crochet
- The First Row Is the Right Side
This pattern is a combination of 2 patterns, my traditional granny square and my cross stitch market bag. Most crocheters know how to make a granny square and you can make yours in any way you like in any design
Traditional Granny Square
Granny square video tutorial - https://www.youtube.com/watch?v=txyudW9lv5E&feature=youtu.be
You can make your squares any size, but here is a guide
Traditional Granny Square
Granny square video tutorial - https://www.youtube.com/watch?v=txyudW9lv5E&feature=youtu.be
You can make your squares any size, but here is a guide
Granny square- make 4 or one large one
Small bag - 4 squares 8 inch x 8 inch/20cm x 20cm
Or 1 square - 16 inch x 16inch/40cm x 40cm
Large bag - 4 squares 12 inch x 12 inch/30 cm x 30cm
Or 1 square 24 inch x 24 inch/ 60 cm x 60cm
Small bag - 4 squares 8 inch x 8 inch/20cm x 20cm
Or 1 square - 16 inch x 16inch/40cm x 40cm
Large bag - 4 squares 12 inch x 12 inch/30 cm x 30cm
Or 1 square 24 inch x 24 inch/ 60 cm x 60cm
Begin with a Magic Ring or Ch4 and Slip Stitch to join.
1: Ch3, 2dc into ring, Ch1, *3dc into ring, Ch 1* Repeat *to* 2 more times. Join to top of Ch 3 with a slip stitch. If you are using the one colour throughout then move onto round 2, if not then fasten off here and sew in your ends.
2: If you are using a new colour then join with a Slip Stitch to any corner. If using the same colour you will slip stitch in next 2 stitches and into ch1 space. Ch3, 2dc, Ch 1, 3dc into same space, *3dc, Ch1, 3dc into next space* Repeat *to* 2 more times. Join to top of Ch3 with a slip stitch. If you are using the one colour throughout then move onto round 2, if not then fasten off here and sew in your ends.
3: If you are using a new colour then join with a Slip Stitch to any corner. If using the same colour you will slip stitch in next 2 stitches and into ch1 space. Ch3, 2dc, Ch1, 3dc into same space, 3dc into next space *3dc, Ch1, 3dc into next corner space, 3dc into next space* Repeat *to* 2 more times. Join to top of Ch3 with a slip stitch. If you are using the one colour throughout then move onto round 2, if not then fasten off here and sew in your ends.
4: If you are using a new colour then join with a Slip Stitch to any corner. If using the same colour you will slip stitch in next 2 stitches and into ch1 space. Ch3, 2dc, Ch1, 3dc into same space, 3dc into next space, 3dc into next space *3dc, Ch1, 3dc into next corner space, 3dc into next space, 3dc into next space * Repeat *to* 2 more times. Join to top of Ch3 with a slip stitch. Fasten off.
Continue like this until your square is as large as you would like it to be. My squares are 8 inch x 8 inch or 20cm x 20cm
If you have made 4 granny squares you need to join them together sewing, crocheted, join as you go, anyway is fine. I crocheted mine together with a single crochet for a tighter join
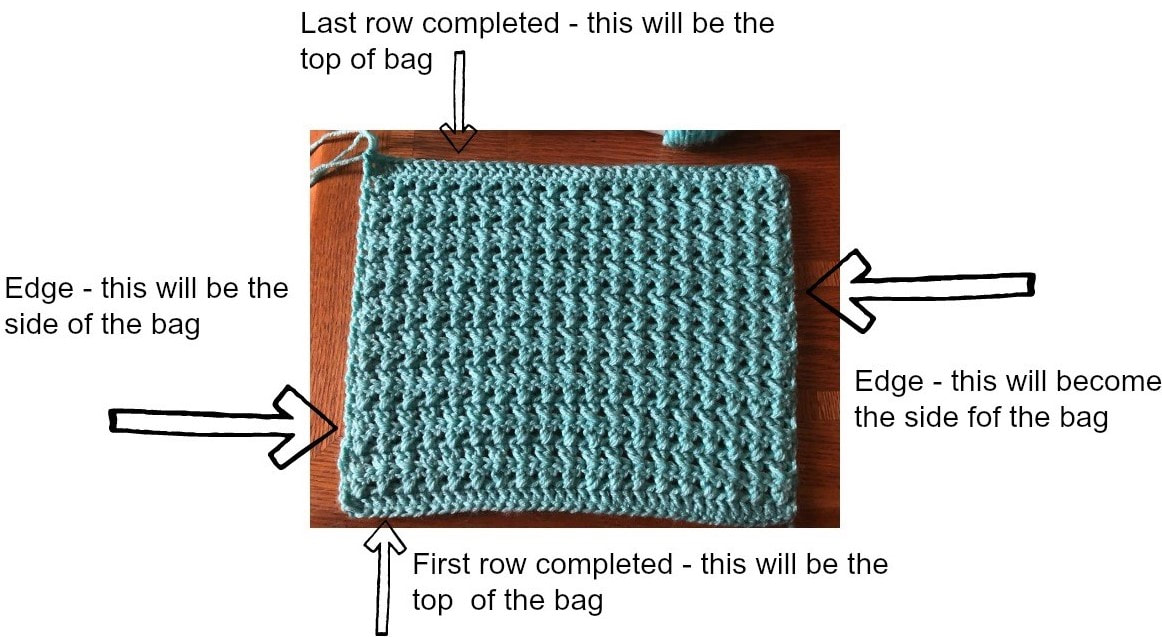
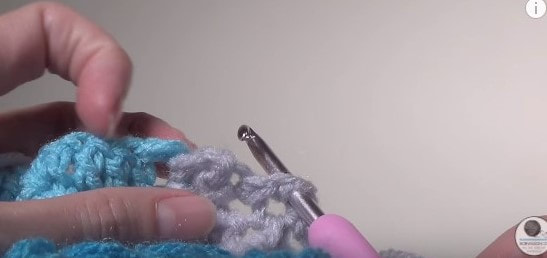
The following images are taken from my granny square market bag pattern, you will have a granny square instead of the cross stitch but the handles are attached the same way
Starting on the right side of your work
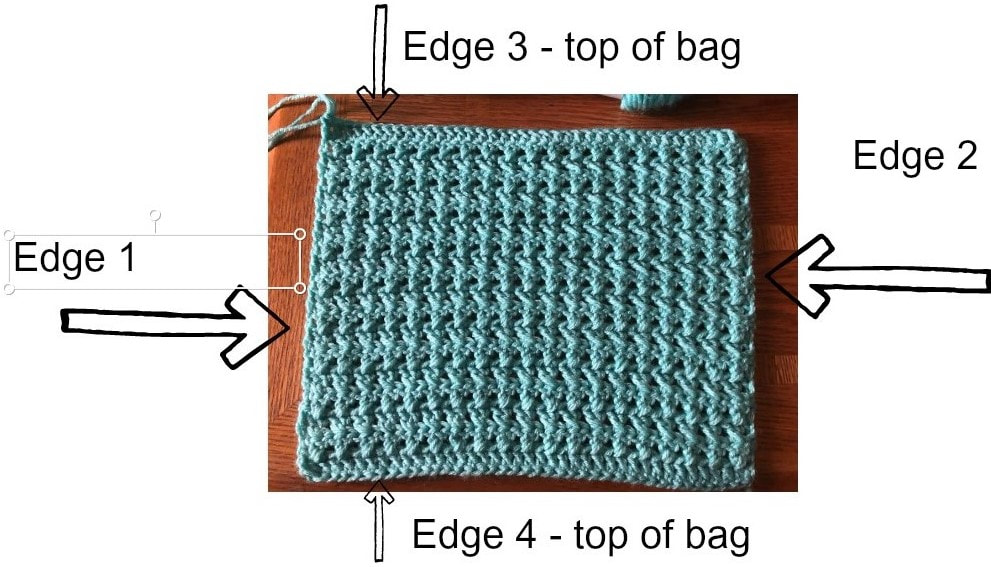
We complete 4 edges in total, 1 for each side of your granny square - 2 sides and 2 tops of the bag Edge 1
We complete 4 edges in total, 1 for each side of your granny square - 2 sides and 2 tops of the bag Edge 1
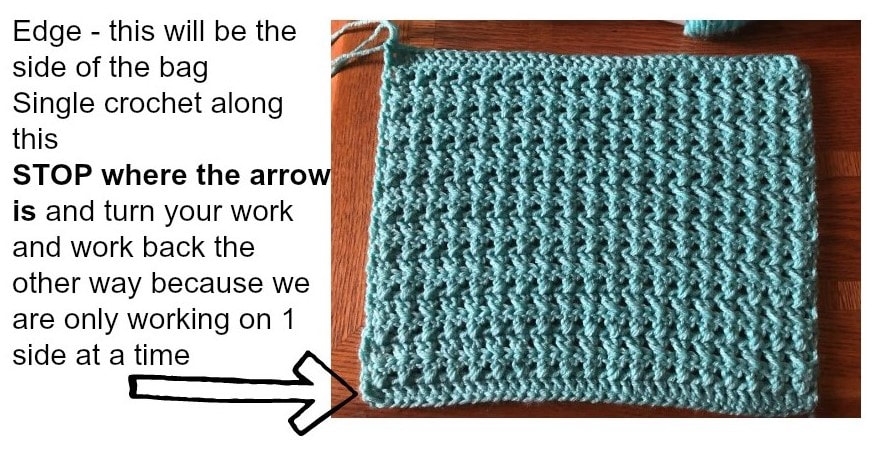
1. Single crochet along the first edge, putting 1 sc in to each stitch and ch1 space, turn
2. Ch 1, sc decrease in each stitch all the way across, turn
3. Repeat row 2
4. Sc into each stitch, turn .
Repeat last row
3. Repeat row 2
4. Sc into each stitch, turn .
Repeat last row
Edge 2
Repeat what we did for the first edge making sure you are starting your crochet on the same side, the right side of your work
DO NOT CUT YARN
Top of bag - Edge 3
1. Single crochet - working along the side of the edging you have just complete and across the row of double crochets, then across 5 stitches of the other edging, turn
2. Sc decrease in each stitch across, turn
3. Sc in each stitch across, turn
4. Repeat row 3
5. Repeat row 3, finish off
Edge 4
Repeat instructions for 2nd top of bag
With right side facing, join yarn into the end of the
last row of the side edging - sorry I know this is
confusing, hopefully this photo helps
DO NOT CUT YARN
Repeat instructions for 2nd top of bag
With right side facing, join yarn into the end of the
last row of the side edging - sorry I know this is
confusing, hopefully this photo helps
DO NOT CUT YARN
Handles
Working on the right side
You will now be working along the shorter side of the bag
1. Single crochet into each stitch on the side of the bag
3. Single crochet into each stitch around. Join to the first sc with a slip stitch
Working on the right side
You will now be working along the shorter side of the bag
1. Single crochet into each stitch on the side of the bag
- Working on the top of the bag, ch 50, skip all of the stitches of the top section of bag, making sure the ch isn’t twisted, single crochet into the 1st stitch of the side of the bag (that we have not crocheted into yet for the handles)
- Single crochet along the side of the bag
- Working on the top of the bag, ch 50, skip all of the stitches of the top section of bag, making sure the ch isn’t twisted. slip stitch to the first sc of the round
3. Single crochet into each stitch around. Join to the first sc with a slip stitch

