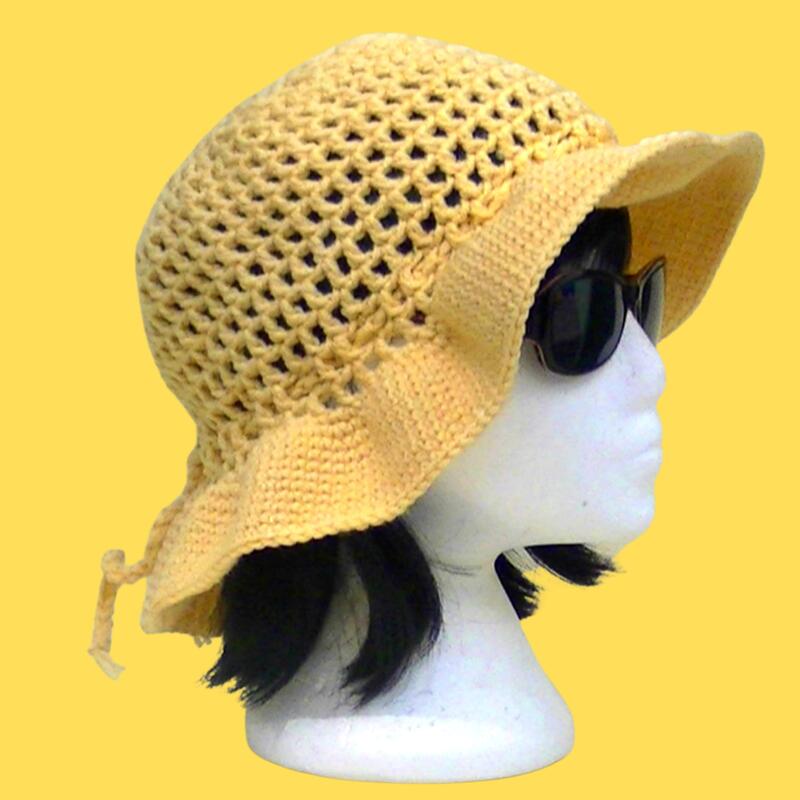
Mesh Sun hat
The brim can be added to any hat
Would you like to buy me a cup of Tea to say thank you for the free pattern and video? Thank you xxx
Click below ⬇⬇
Buy me a coffee
Click below ⬇⬇
Buy me a coffee
Add this project to your Ravelry project page
Mesh Beach Hat
Designed by Clare Sullivan
Video tutorial – www.youtube.com/watch?v=SYpFHe0DEJA
3.5oz / 100 gms Worsted weight yarn and a 5mm/ H hook
OR
3.5oz / 100 gms 8ply / DK / Sports weight yarn and a 4mm / G hook
You will also need a hook that is 2 sizes SMALLER
Stitch marker
Scissors
Stitches used
Yarn needle
Chain
Single crochet
Double crochet
Mathematical formula to make your hat fit
Head circumference measurement divided by 3.14 = The measurement from 1 edge to the other.
Keep increasing until you have that measurement.
For example:
58cm divided by 3.14 = 18 cm (The answer is 18.4cm, you need to round down your answer to nearest whole number)
Keep increasing the hat crown until it is 18cm
The formula will also work for inches
Head Measurements
Crochet stretches so keep this in mind when making hats. If you make a hat ½ inch smaller than
given measurements it will stretch to fit ☺
0-3 months 3 - 10 years
Hat height = 5.5 to 6" Hat height =8.5"
Head Circumference 13" - 14” Head Circumference: 19" - 20 1/2"
3 to 6 months Teenager
Hat height= 6.5 - 7" Hat height 9-10"
Head Circumference: 14" - 17” Head Circumference: 20 1/2" - 22"
6 to 12 months Adult Woman
Hat height = 7.5" Hat height 9-10"
Head Circumference: 16" - 19” Head Circumference: 21.5" - 22.5"
12 months - 3 years Adult Man
Hat height = 8" Hat height 9-10"
Head Circumference: 18" to 20" Head Circumference: 23" - 24"
• The beginning ch4 of each row will count as first dc and a ch1
• We will only be working into the dc from the previous row and not the ch1
Make a magic ring or ch4 and slip stitch to first ch to join.
1. Ch4 (count as first dc and a ch1) *dc into the ring, ch1* repeat from * to * until you have 10 dc’s and 10 ch1, join to the 3rd ch of the beginning ch4 with a slip stitch.
2. Ch4, dc, ch1 into same stitch as the ch4. *dc, ch1, dc, ch1 into the next dc* repeat from * to * around and join to the 3rd ch of the beginning ch4 with a slip stitch.
3. Ch4, (dc, ch1, dc, ch) into the next stitch *1 dc, ch1 into the next stitch, (1 dc, ch, 1 dc, ch1) into the next stitch* repeat from * to * around and join to the 3rd ch of the beginning ch4 with a slip stitch. Do not forget to measure your hat ☺
If at any stage you get to your correct measurement, skip to round 6
4. Ch4, dc, ch1 into the next stitch, (dc, ch1, dc, ch1) into the next stitch *1 dc, ch1 into the next 2 stitches, (dc, ch1, dc, ch1) into the next stitch* repeat from * to * around and join to the 3rd ch of the beginning ch4 with a slip stitch. Do not forget to measure your hat ☺
5. Ch4, dc, ch1 into the next 2 dc, (dc, ch1, dc, ch1) into the next dc. *dc, ch1 into the next 3 dc’s (1 dc, ch1, dc ch1) into the next dc* repeat from * to * around and join to the 3rd ch of the beginning ch4 with a slip stitch. Do not forget to measure your hat ☺
6. Ch4, *dc, chain 1 into the next dc* repeat from * to * around and join to the 3rd ch of the beginning ch4 with a slip stitch.
7. Repeat row 6 until you reach 2 rows shorter than your desired hat length.
|
|
|
Brim
The brim is worked in a spiral and we will not be joining at the end of each round
1. Ch1 (does not count as a stitch), sc into the same stitch, *sc into the ch1, 2 sc into the dc, sc into the ch1, 1 sc into the dc * repeat around DO NOT join with a slip stitch to the first sc.
2. Sc into 1st stitch of round 1 of brim, place a stitch maker in this stitch (this will make the start of each row) *2 sc’s into the next stitch, 1 sc into the next stitch * repeat from * to * around, if you do not end on a sc, it does not matter as this brim is very forgiving.
3. 1 sc into every stitch around, move stitch marker as you get to it and crochet 10 rows. Finish off and sew in any loose ends
Optional drawstring
Using 2 strands of yarn and the same hook you used to make your hat, make a chain that is long enough to go around the hat and tie up at the back
I cord drawstring
Tip: to tighten the I cord, pull up on 2nd loop on hook and then pull 3rd loop as you work.
1. Ch3, go into 2nd ch from hook, pull up loop, go into 3rd ch, pull up loop.
2. Remove 1st two loops from hook and hold them.
3. Ch 1, put next loop you’re holding back on hook, ch1, put last loop you’re holding back on hook, ch1. You should end up with 3 loops on your hook.
4. Repeat steps b & c until you reach the desired length.
5. Yarn over and pull through all 3 loops to fasten off. Weave in ends.
Thank you for choosing my pattern
Clare ☺
|
|
|
|
|
|
|
|


