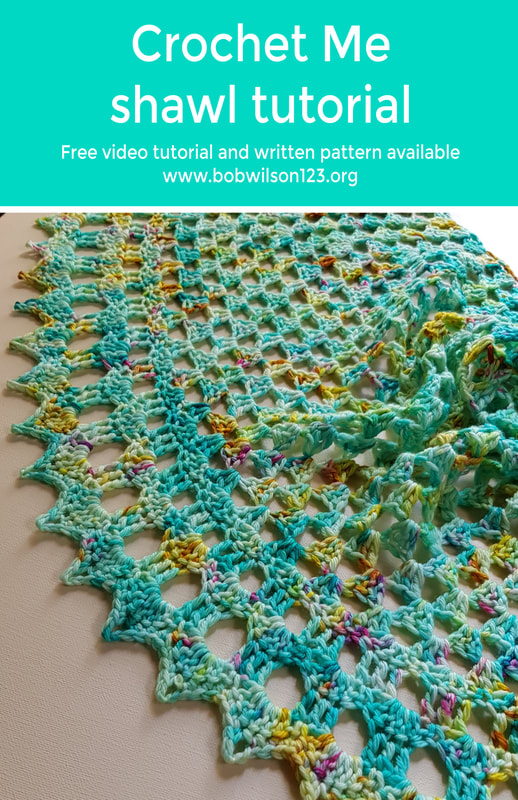
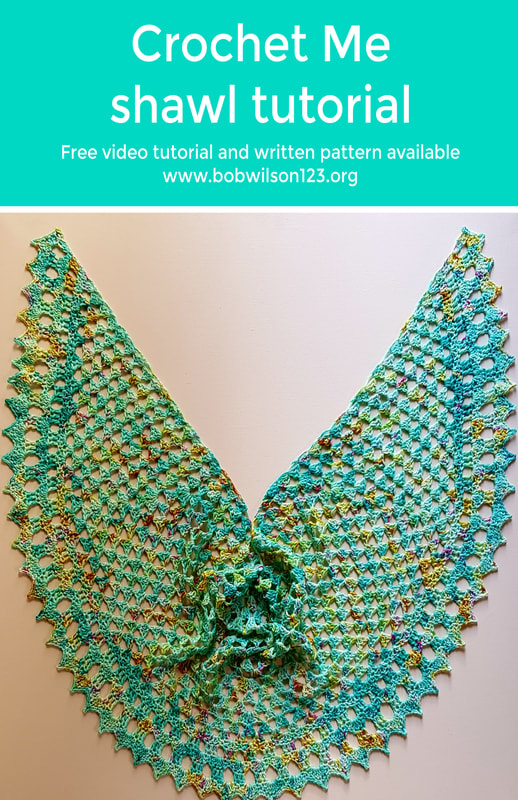
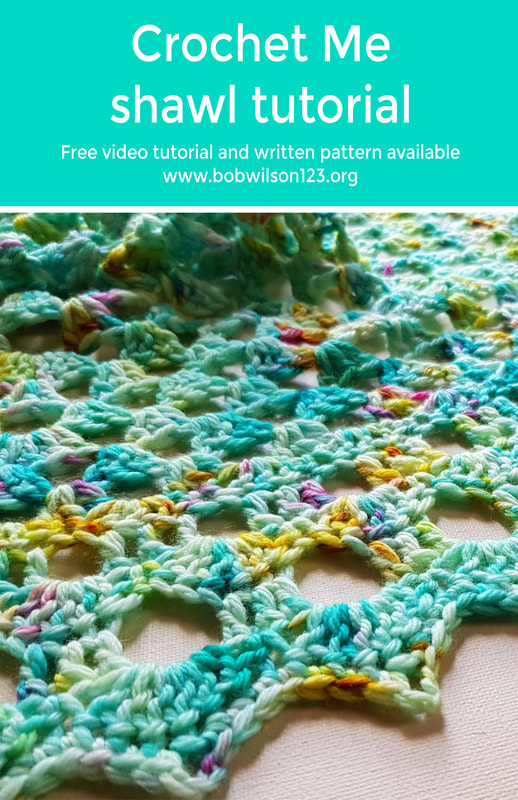
Me shawl
The Jessica shawl edging will also fit on this shawl, you can see the Jessica shawl edging on the 2nd photo
Would you like to buy me a cup of Tea to say thank you for the free pattern and video? Thank you xxx
Click below ⬇⬇
Buy me a coffee
Click below ⬇⬇
Buy me a coffee
Add this project to your Ravelry que
Designed by Clare Sullivan
US terminology
Easy+ - Intermediate
168 cm x 46 cm / 66 inches x 18 inches
Video tutorial - https://youtu.be/1uzHQcA5V4Y
US terminology
Easy+ - Intermediate
168 cm x 46 cm / 66 inches x 18 inches
Video tutorial - https://youtu.be/1uzHQcA5V4Y
I called this pattern the Me shawl because I knew I would love the shawl and I would make it and keep it for “me”. The yarn I used to design the pattern was “me” in a skein of yarn, all of my favourite colours in a yarn skein
Will end with (3 dc, ch 1, 1 dc) in the last space
Your increase is (3 dc, ch 1, 3 dc, ch 1)
You will turn at the end of each row
- The edging will work with any amount of rows
- This pattern contains affiliate links, by making a purchase via the links (the blue underlined words) I will get a small commission at no extra cost to you, this helps keep my video tutorials and patterns free
- Use a crochet hook 2 sizes bigger than recommended by your yarn, I used a 5mm
- 200 grams/400 meters/ 436 yards of Fiber Lily Carousel DK or Dawn DK
- 3 locking (if possible) stitch markers, scissors, yarn needle
- Blocking mats, T pins, blocking wires
- This project benefits greatly by blocking
- Each row (not including edging)
Will end with (3 dc, ch 1, 1 dc) in the last space
Your increase is (3 dc, ch 1, 3 dc, ch 1)
You will turn at the end of each row
1. Ch 62, 3 dc into the 5th ch, ch 1,* skip 2, (3dc, ch1) into the next ch* repeat across ending with (3dc, ch1, 1dc) into last ch
2. Ch 4 (3 dc, ch 1) in 1st ch 1 space (right next to the ch 4) (3 dc, ch 1) in next 9 ch 1 spaces. (3 dc, ch 1, 3 dc, ch 1) in next space. Place a stitch maker in the ch 1 space between the 2 groups of 3 dc you just made- that was your MIDDLE increase (3 dc, ch 1) in the next 9 ch 1 spaces (3 dc, ch 1, 1 dc) in the last space that was created by the skipped chains at the beginning of row 1
3. Ch 4, (3 dc, ch 1) in 1st ch 1 space (right next to the ch 4) (3 dc, ch 1) in each ch 1 space across ignoring stitch marker (3 dc, ch 1, 1 dc) in last ch 1 space
4. Ch 4, (3 dc, ch 1) in 1st ch 1 space (right next to the ch 4) (3 dc, ch 1, 3 dc, ch 1) in next ch 1 space. Place a stitch maker in the ch 1 space between the 2 groups of 3 dc you just made- that was your OUTER increase. Outer will make total sense on row 7, promise
(3 dc, ch 1) in the next 20 ch 1 spaces (3 dc, ch 1, 3 dc, ch 1) in next ch 1 space. Place a stitch maker in the ch 1 space between the 2 groups of 3 dc you just made- that was your other OUTER increase. (3 dc, ch 1, 1 dc) in last ch 1 space
5. Ch 4, (3 dc, ch 1) in 1st ch 1 space (right next to the ch 4) this is the last time I will remind you where the 1st ch 1 space is (3dc, ch 1) in next 12 ch 1 spaces.
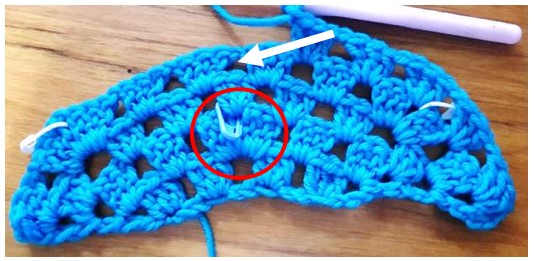
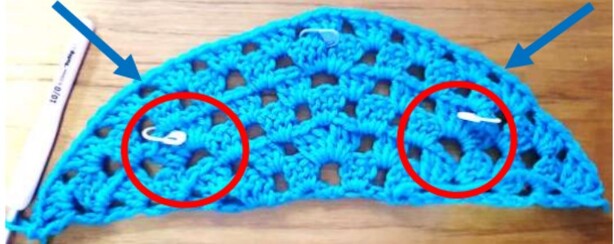
- Your middle stitch marker (marked with red circle in image below) marks the middle increase
- The white stitch markers mark the outer increases
- Depending on what row we are working, the ch 1 space where we need to work our next increase will line up with the stitch maker 3 rows later (see white arrow) this is the same with any increase
- The next lot of instructions will get you to work an increase into the next ch 1 space (see white arrow) see how the ch 1 space is lining up with stitch maker?
- You will notice that the images are of a different shawl, the first row has less chains, the method of increasing is the same for this pattern - Do not pay attention to how many stiches there are, its more the increasing method
(3 dc, ch 1, 3 dc, ch 1) in next ch 1 space. Move the middle stitch maker to the ch 1 space between the 2 groups of 3 dc you just made.
(3 dc, ch 1) in the next 12 ch 1 spaces, ignoring the stitch marker (3 dc, ch 1, 1 dc) in last ch 1 space
Tip - If your edges are getting a little crazy, give a gentle pull on each end to straighten up
(3 dc, ch 1) in the next 12 ch 1 spaces, ignoring the stitch marker (3 dc, ch 1, 1 dc) in last ch 1 space
Tip - If your edges are getting a little crazy, give a gentle pull on each end to straighten up
6. Ch 4, (3 dc, ch 1) into 1st space, (3 dc, ch1) into each ch 1 space across, (3 dc, ch 1, 1 dc) in last ch 1 space
Pattern repeat starts here
Tip - Your stitch markers will be 3 rows below, you will crochet across until the ch 1 space that lines up with the stitch marker, like what you did on row 5
Red circle - outer increases
Blue arrow - ch 1 space that lines up with stitch marker/outer increase 3 rows below
Pattern repeat starts here
Tip - Your stitch markers will be 3 rows below, you will crochet across until the ch 1 space that lines up with the stitch marker, like what you did on row 5
Red circle - outer increases
Blue arrow - ch 1 space that lines up with stitch marker/outer increase 3 rows below
7. Ch 4 (3 dc, ch 1) in 1st space. (3 dc, ch 1) in each space until you get to the outer marker, outer make sense now, right?
(3 dc, ch 1, 3 dc, ch 1) in marked ch 1 space - move stitch marker to the ch 1 space of the increase you just made (3 dc, ch1) in each ch 1 space until you get the other outer marker (ignore middle stitch marker)
(3 dc, ch 1, 3 dc, ch 1) in marked ch 1 space - move stitch marker to the ch 1 space of the increase you just made (3 dc, ch1) in each ch 1 space (3 dc, ch1, 1dc) in last ch 1 space
8. Ch 4, (3 dc, ch 1) in each space until middle stitch marker, ignore outer stitch markers (3 dc, ch 1, 3 dc, ch 1) in ch 1 space - move stitch marker to the ch 1 space of the increase you just made. (3 dc, ch1) in each ch 1 space (3 dc, ch1, 1 dc) in last space
The shawl edging will work with any amount of rows on the main section of your shawl
Note:
Note:
- I finished on my 16th row, which is a row 7
- I got 15 rows out of 1 ball (107 grams/200 m/218 y)
short for pom pom edging.
Simple breakdown of row 6-8 below
6 - No increases except at beginning and end of row
7 - Outer increases
8 - Increase in the middle of row
Repeat row 6 twice more - don’t forget the shawl will grow after you block it
I used 137 grams for the body
75 grams of yarn left before edging
Simple breakdown of row 6-8 below
6 - No increases except at beginning and end of row
7 - Outer increases
8 - Increase in the middle of row
Repeat row 6 twice more - don’t forget the shawl will grow after you block it
I used 137 grams for the body
75 grams of yarn left before edging
Large Edging
You need to turn at the end of your last row so you are working along the last row of crochet
1. Ch 3, 2dc in same stitch, *sc into 2nd dc of group of 3, 3dc into ch 1 space* repeat from * to * across, 3 dc into last space
2. Ch 3, dc into the next 2 dc *ch 2, skip next stitch, 1 dc into the next 3 stitches* repeat from * to *across, 1 dc into last 3 stitches
3. Ch 3, sc into next stitch *5 dc into ch 2 space, skip stitch, sc into the next * repeat from * to * across, dc into the last stitch
4. Ch 3, 2 dc into the same stitch, ch 3, skip 2 *1 dc into the next 3 stiches, skip 3, ch 3* repeat from * to * across, 3 dc into last space
5. Ch 3 *sc into the next stitch, 6 dc into ch space, skip 1 stitch* repeat from * to * across, dc into last stitch
6. Ch 1, sc into same stitch, sc into the next 4 stitches *ch 3, sc into the next 7 stitches* repeat from * to * across. Sc in remaining stitches, finish off and sew in ends
5. Ch 3 *sc into the next stitch, 6 dc into ch space, skip 1 stitch* repeat from * to * across, dc into last stitch
6. Ch 1, sc into same stitch, sc into the next 4 stitches *ch 3, sc into the next 7 stitches* repeat from * to * across. Sc in remaining stitches, finish off and sew in ends
Pom Pom Edging - you will be working along the last row of your shawl
5 dc Cluster stitch, the following instructions are a lot of words for only 5 stitches haha The Edging instructions start after the cluster explanation
5 dc Cluster stitch, the following instructions are a lot of words for only 5 stitches haha The Edging instructions start after the cluster explanation
- Step 1: Yo on hook.
- Step 2: Insert hook into stitch to be worked, yo and draw through.
- Step 3: Yo and draw through 2 loops on hook (2 loops remain on hook).
- Step 4: Yo on hook.
- Step 5: Insert hook into stitch to be worked, yo and draw through.
- Step 6: Yo and draw through 2 loops on hook (3 loops remain on hook).
- Step 7: Yo on hook.
- Step 8: Insert hook into stitch to be worked, yo and draw through.
- Step 9: Yo and draw through 2 loops on hook (4 loops remain on hook)
- Step 10: Yo on hook.
- Step 11: Insert hook into stitch to be worked, yo and draw through.
- Step 12: Yo and draw through 2 loops on hook (5 loops remain on hook).
- Step 13: Yo and draw through all loops on hook
- Step 14: Ch 1 to secure
You need to turn at the end of your last row so you are working along the last row of crochet
Ch 4 (you can change this to more or less depending on how dangly you want them)
First half of pom pom
*ch 3, cluster into the 3rd ch from hook (the cluster will have 5 stitches which is made up of ch 3, 4 dc’s)
*repeat from * to * once more for the second half of the pom pom. Fold the top half of pom pom to the back (away from you) and slip stitch from the back of the work into the ch the 1st half of the bobble was worked into. Ch 4 (if you changed the amount of chains you did to make it more dangly, do that many again) slip stitch into the next space. Repeat all of the directions across the row and slip stitch into the last space
Thank you for choosing my pattern
Happy crochet
Clare xx
|
|
|

